Brand: New Holland
File Format: PDF
Compatible: All Versions of Windows & Mac
Language: English
Requirements: Adobe PDF Reader or Foxit Reader
Size: 53.8MB
Pages: 787
Download Complete Service Repair Manual for New Holland BB9090 Square Baler
This Factory Service Repair Manual offers all the service and repair information about New Holland BB9090 Square Baler The information on this manual covered everything you need to know when you want to repair or service New Holland BB9090 Square Baler
Models Covered:
New Holland BB9090 Square Baler
Manual Contents:
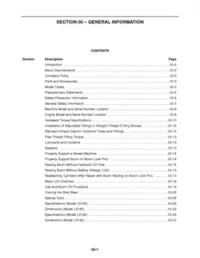
GENERAL INFORMATION
Introduction 01-5
To the Dealers
01-5
Units of Measurement 01-6
Table of Contents 01-6
Page Numbers
01-6
SAFETY
Safety Alert Symbol 01-9
Safety Messages 01-9
Informational Messages
01-9
Safety Signs 01-10
A Word To The Operator 01-10
Service Manual
01-11
Operator Manual 01-11
Prepare For Operation 01-12
Operation
01-12
General Information 01-12
Personal Protection Equipment 01-13
Seat Instructions 01-14
Shields and Guards
01-14
Exhaust Warning 01-15
Flying Debris 01-15
Handrails
01-15
Agricultural Chemicals 01-16
Travel On Public Roads 01-16
Maintenance
01-18
General Information 01-18
Fire Prevention and First Aid 01-20
Checking for High Pressure Leaks 01-21
Tire Safety
01-21
COMPONENT IDENTIFICATION
Outside View Left-hand Side 01-23
Outside View Right-hand side 01-24
Inside Right-hand Side View
01-25
Inside Left-hand Side View 01-27
Serial Number Plate Location 01-29
Serial Number Definition (2009 and Prior)
01-30
Serial Number Definition (2010 and After) 01-30
Operator Manual Container 01-31
Tool Box
01-31
SBC (Square Baler Controller) 01-32
Fuses 01-32
Sensors and Switches
01-33
CAN Terminators 01-33
Consoles 01-34
PREPARATION FOR OPERATION
Installing a European Type Hitch
01-37
Preparation 01-37
Hitch Component Identification 01-37
Baler Height Setting
01-38
Tractor Dimensions 01-38
Hitch Installation 01-39
CE Hitch Bracket Installation
01-40
Connecting the Hitch to the Tractor 01-41
Raising the Jack 01-43
Safety Transport Chain
01-43
CV IDL Preparation 01-44
CV IDL Installation 01-44
CV IDL Angle 01-45
CV IDL Angle Adjustment
01-45
CV IDL Clearance 01-46
Installing an ASABE (American Society of Agricultural and Biological Engineers) Type Hitch 01-48
Preparation 01-48
PTO Types
01-48
Tractor Dimensions 01-49
Baler Height Setting 01-49
Hitch Ball Adjustment 01-50
Installing the Hitch
01-50
Connecting the Hitch to the Drawbar 01-51
Raising the Jack 01-52
Safety Transport Chain 01-52
Connecting an EA (Equal Angle) IDL 01-53
EA (Equal Angle) IDL Angle
01-55
EA IDL Angle Adjustment 01-55
Electrical and Hydraulic Connections 01-56
Connecting ASABE Type Lamp Wiring Harness Plug
01-56
ASABE Type Baler Road Lamp Table 01-56
Connecting ISO Type Lamp Wiring Harness Plug 01-57
Connecting Baler Harness Plug
01-57
Four Pin Plug and Baler Disconnect Brake (If Equipped) 01-58
Connecting the Baler Harness to the Console Harness 01-58
Connecting the Hydraulic Lines 01-58
Brake Connections if Equipped
01-59
Twine Information 01-61
Plastic Twine 01-61
Sisal Twine 01-61
Twine Boxes
01-62
Twine Ball Installation 01-62
Threading the Needles Four Twine Balers 01-63
Left-hand Twine Box for Needles
01-64
Right-hand Twine Box for Needles 01-65
Twine Box Tensioners for Needles 01-66
Routing the Needle Twines into the Baler
01-66
Threading the Needle Twine Tensioners and Needle Slacker Arms 01-67
Routing the Twines to the Needles 01-68
Threading the Knotters Four Twine Balers
01-69
Left-hand Twine Box for Knotters 01-70
Right-hand Twine Box for Knotters 01-71
Routing the Knotter Twines into the Knotter Area on the Left-hand Side
01-72
Twine Box Tensioners for Knotters Left-hand Side 01-72
Routing the Knotter Twines into the Knotter Area on the Right-hand Side 01-72
Twine Box Tensioners for Knotters Right-hand Side
01-73
Routing Twines Through the Knotters 01-73
Tying the Needle and Knotter Twines Four Twine Balers 01-74
Threading the Needles Six Twine Balers
01-75
Left-hand Twine Box for Needles 01-76
Right-hand Twine Box for Needles 01-77
Twine Box Tensioners for Needles
01-77
Routing the Needle Twines into the Baler 01-78
Threading the Needle Twine Tensioners and Needle Slacker Arms 01-79
Routing the Twines to the Needles
01-80
Threading the Knotters Six Twine Balers 01-81
Left-hand Twine Box for Knotters 01-82
Right-hand Twine Box for Knotters
01-83
Routing the Knotter Twines into the Knotter Area on the Left-hand Side 01-84
Twine Box Tensioners for Knotters Left-hand Side 01-84
Routing the Knotter Twines into the Knotter Area on the Right-hand Side
01-84
Twine Box Tensioners for Knotters Right-hand Side 01-85
Routing Twines Through the Knotters 01-85
Tying the Needle and the Knotter Twines Six Twine Balers 01-86
OPERATION
Pre-Operation Inspection
01-87
After The First Hour Of Operation 01-88
Daily 01-88
General Operating Information
01-88
High Quality Hay 01-88
Crop Preparation 01-89
Dew Moisture
01-89
Baling High Quality Hay 01-90
Pressure Reading Examples for Dry Crop 01-91
Dry Forage Hay Bale Storage
01-91
High Moisture Silage Bales 01-91
Baling Silage Bales 01-92
Removing High Moisture Bales When Finished with Baling 01-92
High Moisture Silage Bale Storage
01-92
Flywheel Brake 01-93
Knotter/Needle Lockout 01-93
Knotters
01-94
Double Knotter System 01-94
Knotter Operation 01-95
Knotter Slacker Upper Switch and Lower Switch Alarms
01-97
Knotter Slacker Upper Switch Alarm 01-97
Knotter Slacker Lower Switch Alarm 01-98
Needle Alarms
01-98
Monitoring Flags 01-98
Missing Knots 01-99
Pickup Feeding and Plunger 01-99
Pickup Position
01-100
Plunger Load Settings 01-101
Bale Density Cylinder Pressure 01-102
Stuffer Brake
01-103
Stuffer Sensor Door 01-103
Charge Holding Fingers 01-103
Stuffer Cycle 01-104
Flakes/Bale 01-104
PTO/Driveline System
01-105
Shearbolts 01-105
Clutches 01-108
Sensors and Switches
01-110
Packer Clutch Sensor Pickup Clutch Sensor and Feeder Slip System 01-111
Stuffer Drive and Stuffer Cycle Sensors 01-112
Needle Home Switch 01-112
Needle Protection Linkage
01-113
Knife Operation With Rotor Cutter Balers 01-113
Engaging and Disengaging Knives 01-113
Knife and Filler Plate Settings
01-113
Knife Operation With Packer/Cutter Balers 01-115
Engaging and Disengaging the Knives 01-115
Knife and Filler Plate Settings
01-116
Control Valves 01-116
Bale Density Valve and Bleed Off Valve 01-116
Bale Density Valve with Bleed Off Valve and Pressure Compensation
01-118
Operation of the Roller Bale Chute and Ejector (If Equipped) 01-118
How to Lower the Roller Bale Chute 01-118
How to Use the Ejector
01-119
How to Raise the Roller Bale Chute 01-122
Knotter Lubrication System 01-124
Knotter Lubrication Pump 01-124
Knotter Lubrication Points
01-124
Lighting and Reflectors 01-124
Lighting and Reflectors For European Balers 01-126
Starting and Stopping the Baler 01-127
Balers With a Bale Density Bleed Off Valve
01-127
Stopping and Starting Balers Without a Bale Density Bleed Off Valve 01-129
Dos and Donts 01-129
Baling Preparation
01-130
Baling The First Bale 01-130
Baling Procedure 01-131
Tandem Axle (If Equipped) 01-132
Removing a Bale From the Bale Chamber
01-133
Towing or Transporting The Baler 01-134
Lifting the Pickup 01-134
Safety Transport Chain and Travel Route Selection
01-135
Disconnecting From the Tractor 01-135
Brake Procedures 01-136
Balers with Disconnect Brake System and Hydraulic Brakes
01-136
Balers with Disconnect Brake System and Air Brakes 01-136
Final Disconnect Procedures for All Balers 01-137
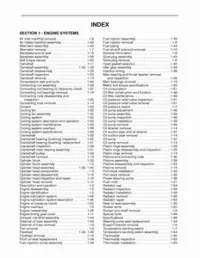
INDEX
01-139
Total Pages: 1093
This manual can be used by anyone from a first time owner/amateur to a professional technicianEven the most novice mechanic can also easily follow the step-by-step guides which are made simple by the illustrations and drawings
Keep this manual handy and use it often Performing routine preventive maintenance will save you time & money by helping to prevent premature failure and unnecessary repairs
Your email inbox will receive a download link immediately after your payment is completed
So please make sure your email address is correct
File Format: PDF
Compatible: All Versions of Windows & Mac
Language: English


